If you are looking to set up a referral program for your Wix store, this guide will work you through the process. Thousands of Wix Ecommerce shops use OSI Affiliate Software to set up and manage their Wix Ecommerce store. We have made the integration simple.
If you do not currently have OSI Affiliate Software then you should watch this video to learn how our software works.
1. Sign Up For OSI Affiliate Software
Once you sign up for OSI Affiliate Software, setting it up for your Wix store is easy!
How to Integrate OSI Referral Software into your Wix Store
Request for free software integration by logging in to your OSI Admin account and click Set Up Software.

Click Request Software Integration.

Fill out the form.

Note: You have the option to provide us with your Wix login credentials or send an invite to [email protected] as Website Manager. To know how to send an invite, click here.
You will get an email confirmation once the integration has been completed.
Configure Sign Up Page For WIx Referral Software
OSI Affiliate Software provides you with two unique ways in which you can sign up affiliate users to your account. You may select any of the two ways to add affiliates as shown below.

I. Interface Sign Up
OSI offers a customizable signup interface option that you can link from your web site and have affiliates sign up. This interface has a main page where you can add all the content describing your program. You can add your own logo and customize some of the colors to this interface shown below. To customize and launch this page, follow the steps below:
Step 1. Log in to your OSI Admin account and click Configure Sign up Page.

Step 2. From here you would be able to choose whether to copy the affiliate sign-up page link, customize, or view the sign-up page.

Step 3. On the same page, click on Customize.

Step 4. You will be on the Page Details tab. Here you can upload your Logo or paste a logo link.

Below that, you can modify the Right side Heading & Text.

And modify the Text on the Left Side Text Area as shown in the sample above.

Here you can also enable spam protection. If a bot is detected, it will prevent it from submitting.

Step 5 After updating Page Details, you need to click on Configure Form fields to add new Fields or Update existing Fields/Positions.

Form Fields
The blue pencil icon lets you modify a field while the red icon deletes it.
The checkmarks represent the attribute for each field.
Display on user Registration – this information will be asked from an affiliate during sign-up.
Required – this information is mandatory for the registration to go through.
Allow User to Modify – this information can be modified by the affiliate.

The type determines the type of information that can be placed for the field.
Text box – Free text. No restrictions.
Text Area – Same as text box but bigger in size.
Dropdown Menu – Restricted to set of information determined by you.
Radio Buttons – Restricted to set of information determined by you.
Checkbox (Single) – A single checkbox for confirmation/acknowledgement purposes.
Checkboxes (Multiple Selection) – Multiple checkboxes to confirm/acknowledge the set of information determined by you.
State – A drop-down list of US States.
Country – A drop-down list of all countries.
II. Manually Add Users
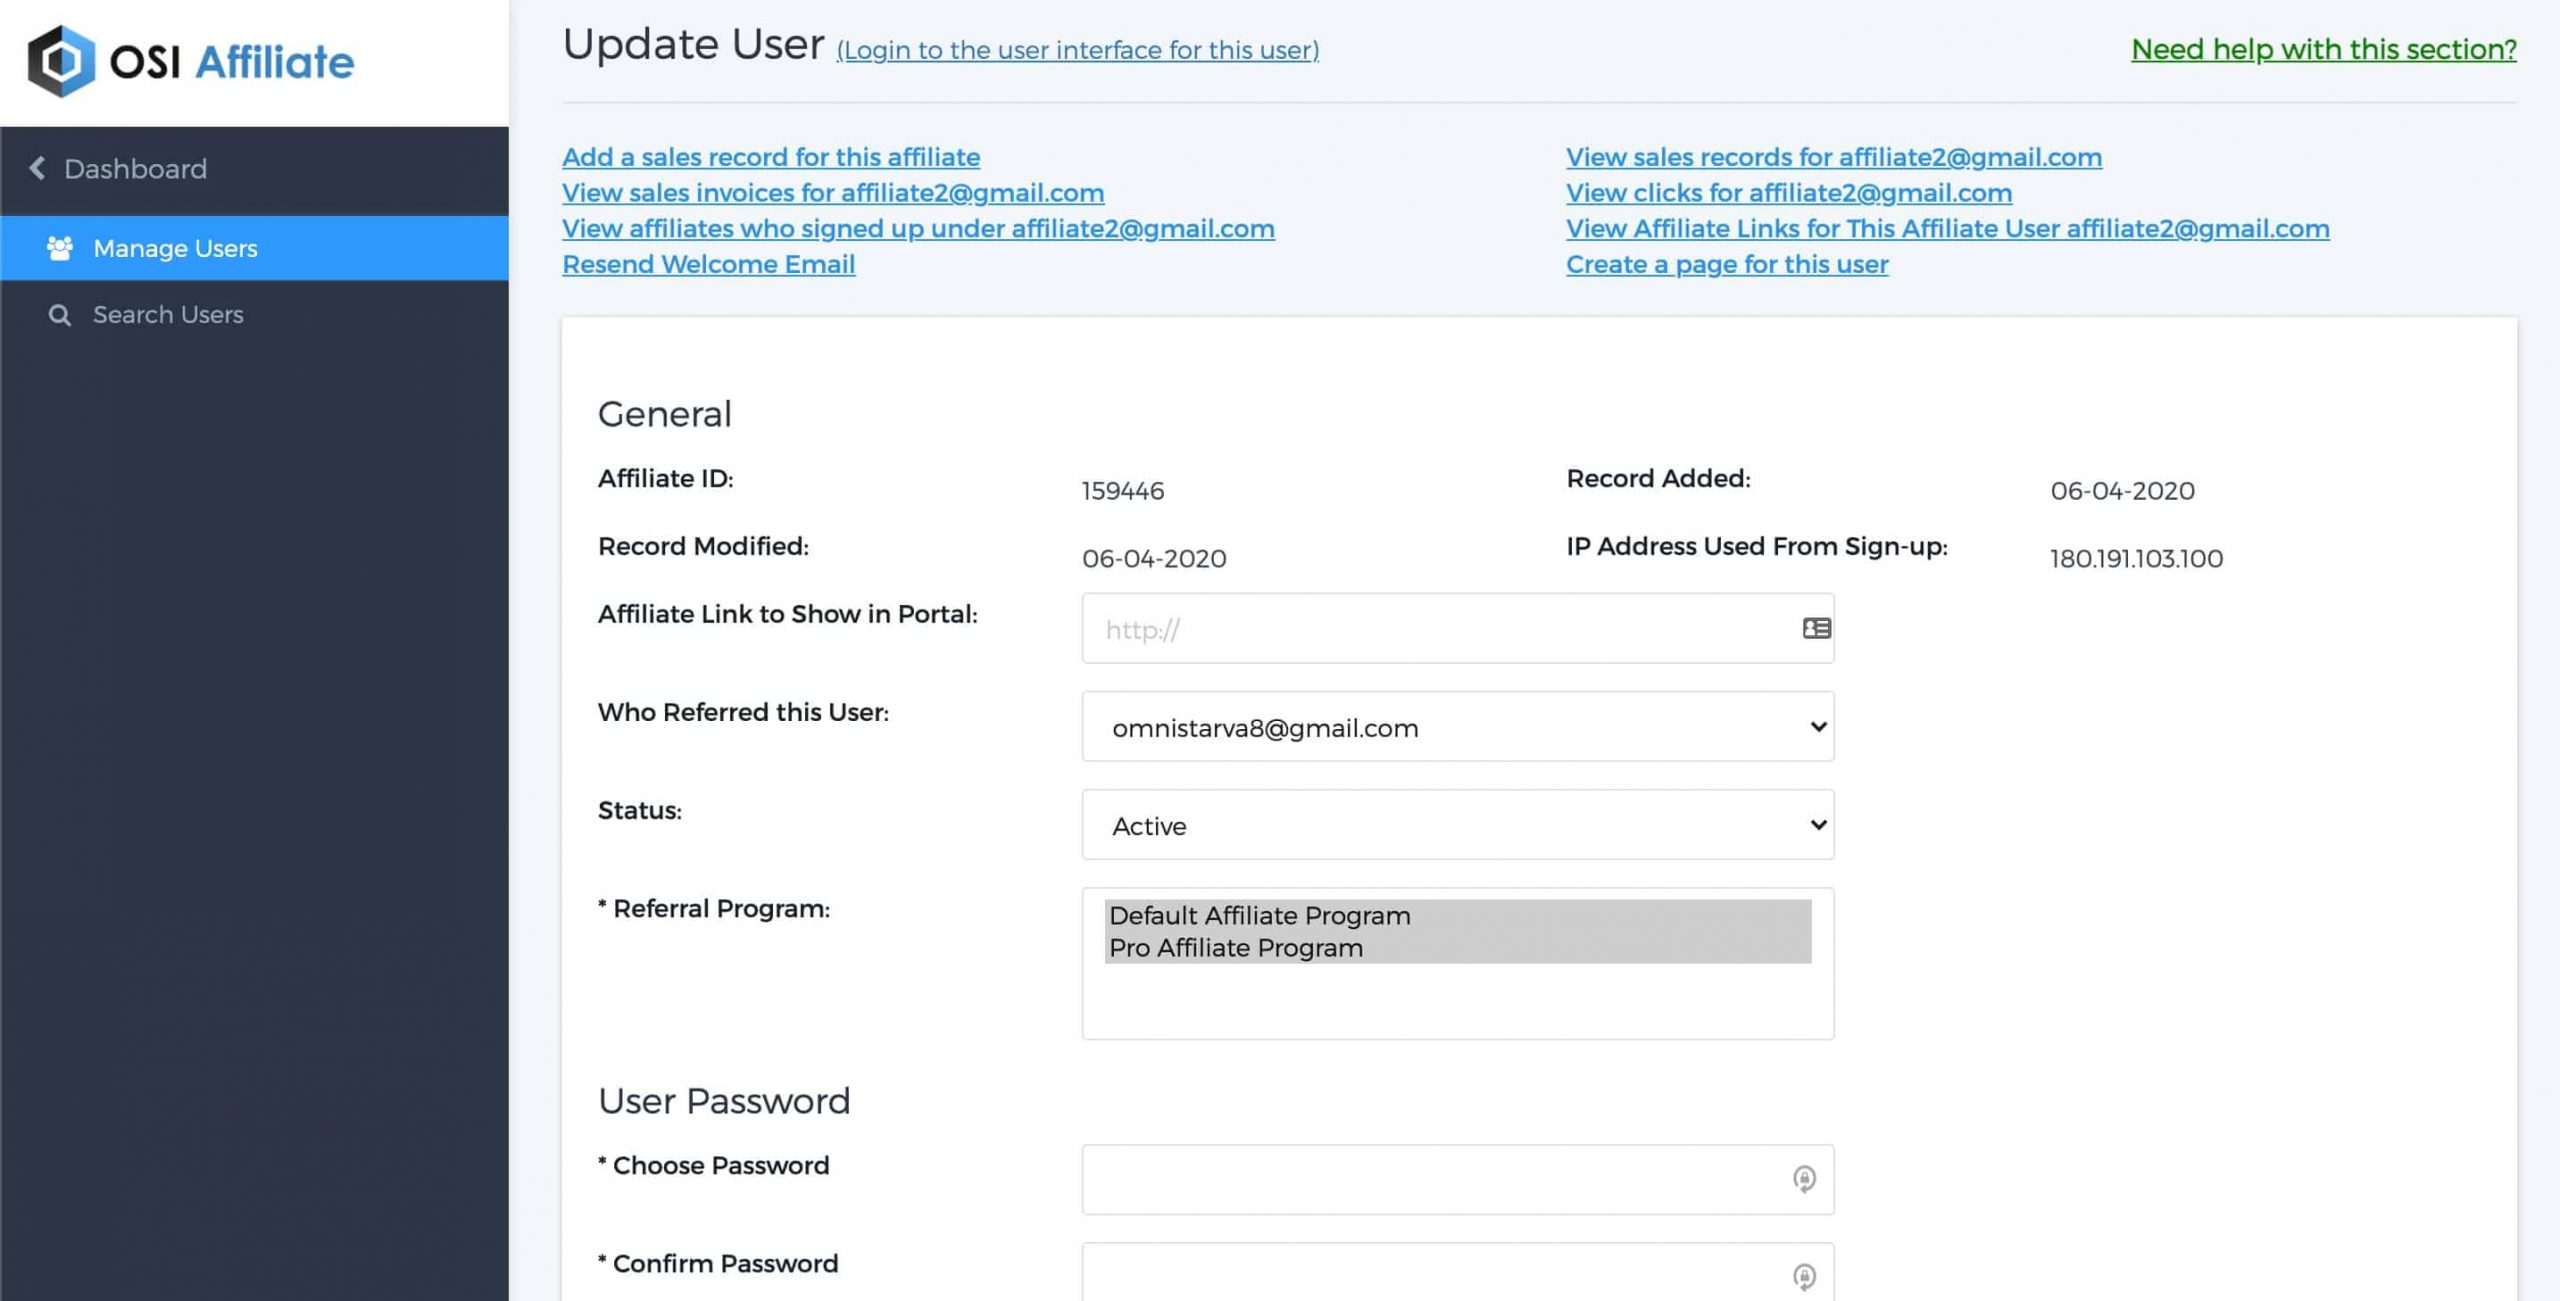
You can manually add users without going through the sign-up page by following the steps below:
Step 1. On your admin dashboard click Users.

Step 2. Click on Add User button.

Step 3. Fill out all mandatory information marked with an asterisk (*).
Note: For Referral Program, you can pre-determine which referral program/s they will have access to. You can select individual programs using the Ctrl key.

Step 4. Click on the Update button once done.

How Wix Users Can Promote Their Referral Program Using OSI Affiliate
The affiliate program determines the landing page where the affiliate link where redirected or what you pay affiliates for referring a sale. It can be a percentage of a sale total, a fixed amount, or a custom reward.
Step 1. Log in to your OSI admin dashboard and click on Referral Programs.

Step 2. Click on Add button.

Step 3. Fill in the fields of Referral Program Name and Description which will appear on your affiliate’s dashboard.

Step 4.1. Select Money from the drop-down if you want to pay the affiliate with a percentage of the sale or a flat fee per transaction.

Step 4.2. Select Something Other Than Money from the drop-down if you want to pay the affiliate with a custom reward such as gift cards and store credit for every number of required sales they refer.

Step 5. Click on Continue once done.

Step 6. Select the following options as Landing Page once an affiliate link is clicked:

- Send Directly to My Store</b – redirects to your website / online store
- Coupon with Template – redirects to a coupon page with editable text before taking customers to your website / online store
- Coupon with Image – redirects to a coupon page with editable text and image before taking customers to your website / online store
Step 7. [Something Other Than Money] You will be prompted to create a reward if you selected the Something Other Than Money option.

Step 8. [Something Other Than Money] Click on the Add New Reward button.

Step 9. [Something Other Than Money] Fill out the mandatory fields.

- Reward Name
- Referral Program – select the program that this reward applies to
- Number of Leads Required – this is the number of sales/leads referred by the affiliate regardless of the transaction or order amount
- Description – will be shown on the affiliate’s dashboard while the affiliate has still not achieved the required sales/leads
- Default Message – will be shown on the affiliate’s dashboard once the affiliate has achieved the required sales/leads
- Approved Reward Message – will be shown on the affiliate’s dashboard once the admin has approved the reward.


